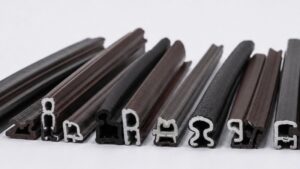
A custom can fit your existing groove, control closing force, cover an unusual gap, or match a specific door-frame design.
To develop a reliable custom door seal, you should define the cross-section, groove dimensions, working gap, compression, hardness, tolerances, and material requirements. You should also agree on samples, tooling, MOQ, and lead time before mass production.
Start with the Technical Requirements
Prepare a Clear Cross-Section Drawing
The cross-section is the most important part of your specification.
A 2D drawing should show the complete shape of the seal at its natural, uncompressed condition. Include dimensions for the sealing bulb, mounting foot, lips, ribs, hollow chambers, and other functional areas.
At minimum, mark:
- Overall profile width and height
- Mounting-foot width and depth
- Sealing-bulb dimensions
- Wall thickness where important
- Lip thickness and length
- Critical radii or angles
- Material
- Hardness
- Dimensional tolerances
Identify which dimensions directly affect installation and sealing. For example, the mounting foot may need closer control because it must fit a fixed groove. A decorative outer edge may allow more variation.
If you do not have a complete CAD drawing, you can provide an existing sample together with the door-frame dimensions. Your supplier can then help convert the sample into a manufacturing drawing.
Specify the Groove Dimensions
The seal must fit the groove, door leaf, and frame.
You should therefore provide:
- Groove opening width
- Groove depth
- Groove shape
- Maximum and minimum groove dimensions
- Distance from the groove to the sealing surface
- Material of the door or frame
- Installation direction
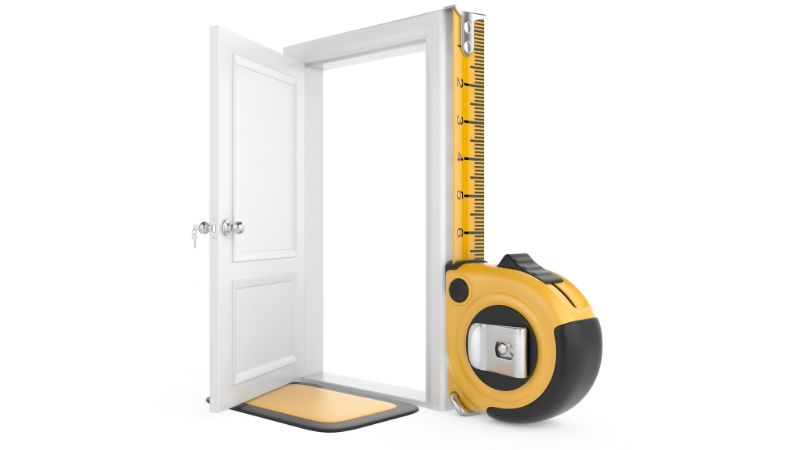
This is especially important for kerf-slot seals.
If the mounting foot is too small, the seal may become loose during installation or repeated door use. If it is too large, installers may struggle to insert it. Excessive insertion force can also stretch or damage a soft profile.
For a new custom profile, send the actual groove drawing whenever possible.
Define the Working Gap and Compression
Your supplier also needs to know the distance between the door and frame when the door is fully closed.
This is your working gap.
You should provide both the nominal gap and its expected variation. For example:
Working gap: 5.0 mm nominal, 4.5–5.5 mm actual range.
This information helps the engineer determine the required height and flexibility of the sealing section.
Compression can be expressed as:
Compression (%) = (Free Seal Height − Installed Height) ÷ Free Seal Height × 100
For example, imagine that a sealing bulb is 10 mm high in its free state and becomes 7 mm high after the door closes. The compression is 30%.
The correct compression depends on profile geometry, hollow structure, material, hardness, sealing target, and closing force. Different compression levels also create different loads on hinges, locks, and door-closing hardware.
Choose Hardness According to Function
A softer compound can make the profile easier to compress. A harder compound can provide greater structural support. However, you cannot select hardness separately from profile geometry.
A thin hollow section in one hardness can behave very differently from a thick solid section using the same material.
Mark Critical Tolerances Clearly
Extruded profiles are flexible materials.
Very tight tolerances on every dimension can increase development difficulty without improving door performance.
Separate dimensions into two groups.
Critical dimensions may include:
- Groove-fitting foot width
- Mounting-leg height
- Overall sealing height
- Critical contact lips
- Features that connect with another component
Non-critical dimensions may include small radii, decorative surfaces, or dimensions that do not affect fit or compression.
Ask the supplier to review the drawing before tooling starts. Their extrusion experience can help identify dimensions that are difficult to hold consistently.
A practical specification focuses on tolerance where it actually protects performance.
| Information to provide | Example | Why it matters |
| Cross-section drawing | 2D CAD/PDF with dimensions | Defines the profile geometry |
| Groove size | 4.5 mm wide × 8 mm deep | Controls mounting fit |
| Working gap | 4–6 mm | Determines sealing range |
| Compression | Defined by gap and profile | Affects sealing and closing force |
| Material | EPDM, TPE, silicone, etc. | Affects environment and processing |
| Critical tolerances | Marked on drawing | Improves fit consistency |
| Color | Black, gray, custom | Controls appearance |
| Length | Coil or cut length | Affects production and packing |
| Annual quantity | Estimated demand | Helps tooling and MOQ planning |
Confirm Samples, Tooling, MOQ, and Lead Time Before Production
Approve a Physical Sample Before Mass Production
Whenever possible, test a physical sample in the real door system before approving mass production.
Check:
- Whether the foot enters the groove correctly
- Whether the seal remains secure
- Whether the door closes smoothly
- Whether the bulb reaches the mating surface
- Whether compression is even
- Whether corners create problems
- Whether the profile twists during installation
- Whether the appearance meets your requirement
You should test the minimum and maximum expected door gaps, not only the nominal dimension.
For a new door program, it is also useful to install samples on a complete door.
A seal may feel soft on your desk but generate significant resistance when installed around the full perimeter of a door.
Understand What Tooling You Are Paying For
Custom extruded profiles normally require dedicated profile tooling.
The tool determines the cross-sectional shape as material passes through the extrusion process. More complex structures can require more development work.

Before placing the tooling order, confirm:
- Tooling cost
- Who owns the tooling
- Whether tooling is stored for repeat orders
- Whether future tool modification is possible
- Whether sample production is included
- How many revisions are included
- What happens if the first sample requires adjustment
Freeze the basic profile, material, and critical dimensions first. Changing the cross-section after tooling begins can create additional cost and delay.
Ask for the MOQ of Your Actual Custom Profile
MOQ can change according to material, compound, profile size, color, production setup, packaging, and whether your order uses a standard or custom formulation.
Ask your supplier to quote the MOQ for the exact approved profile.
You can also provide an estimated annual demand, such as:
- Initial trial quantity
- Normal batch quantity
- Annual forecast
- Number of door models using the profile
This helps the supplier understand whether the project is a one-time custom extrusion or a repeat production program.
For B2B sourcing, a stable production batch with consistent material and dimensions may be more valuable.
Break Lead Time into Clear Stages
For a new custom seal, ask the supplier to separate the project into stages:
- Drawing and specification review
- Tooling preparation
- First sample production
- Your sample testing and approval
- Tool adjustment, if needed
- Mass production
- Packing and shipping
The final schedule depends heavily on how quickly the drawing and samples are approved.
If your project has a fixed launch date, tell the supplier early. Work backward from the required delivery date and leave time for at least one sample evaluation.
Send a Complete RFQ Package
The fastest way to receive an accurate quotation is to send all important information together.
Your RFQ package should ideally contain:
- 2D or 3D profile drawing
- Door and frame drawing
- Groove dimensions
- Minimum and maximum working gap
- Preferred material
- Hardness
- Color
- Profile length
- Required tolerances
- Existing sample, if available
- Application environment
- Estimated order quantity
- Annual demand
- Packaging requirement
- Required delivery date
A supplier with custom extrusion experience can then review the application and suggest adjustments before tooling begins.
Ready to Develop Your Custom Door Seal Profile?
A reliable custom seal starts with accurate application data. Winguard supports custom sealing profiles based on 2D or 3D drawings as well as physical samples. Cross-section, dimensions, color, hardness, and length can be customized according to the project.
Send Winguard your drawing, groove dimensions, working gap, material requirement, hardness, expected quantity, and existing sample. Our team can help you move from design evaluation to sampling and repeat production.
Contact us today to discuss your custom door seal profile.
Frequently Asked Questions
What Information Do You Need to Customize a Door Seal?
Start with a profile drawing or physical sample. You should also provide the groove size, door gap, material requirement, hardness, color, length, quantity, and application conditions.
The door-frame drawing is very useful because it shows how the seal will actually be installed.
Can You Develop a Door Seal from an Existing Sample?
Yes. A physical sample can be used as a reference when a complete engineering drawing is unavailable. Winguard states that it supports customization according to drawings or samples.
You should still verify the final drawing before tooling because an old sample may already be stretched, compressed, or worn.
How Do You Choose the Correct Compression?
Start with the actual free profile height and the minimum and maximum closed-door gaps.
Do not use one standard compression percentage for every design. The correct value depends on material, hardness, cross-section, hollow chambers, and acceptable door-closing force.
Testing a sample in the complete door assembly is the safest approach.
Which Is More Important: Hardness or Profile Shape?
Both matter. Hardness influences flexibility and compression force, while profile geometry controls how the seal bends and contacts the frame. Two profiles made from the same Shore A material can behave very differently if their wall thicknesses and hollow sections are different.
Do Custom Door Seals Require Tooling?
A new extruded cross-section will normally involve profile tooling. Whether additional tooling or processing is required depends on the design, material, and manufacturing process.
Confirm the tooling cost and sample process before approving development.
How Long Does a Custom Door Seal Take to Develop?
The schedule depends on drawing approval, tooling, sample production, testing, possible revisions, and mass production.
Ask for each stage separately. This gives you a more realistic project schedule than asking only for the production lead time.